OutSystems - Implementing the Date Picker widget in Mobile and Reactive apps (Part 2)
 by
by
This is the Part 2 of a how-to guide on how to implement the OutSystems’ built-in Date Picker widget and override some undesired behaviour on the way.
On Part 1 of this guide, I handled the Date Picker set up and fixed an issue with its date format. Now, I’ll show you how I managed to:
- Disable writing on an Input bound to a Date Picker (point 2 from Part 1), and;
- Remove a date from a Date Picker (point 3 from Part 1);
To tackle these points, I added a snippet of javascript to the code. The idea is to add the JS snippet when the page is ready, to prevent the user from typing on the Input widget (point 2) and call a new action if the user clicks on delete (point 3). This new action forces the local variable to be set to a null whenever the user clicks on delete.
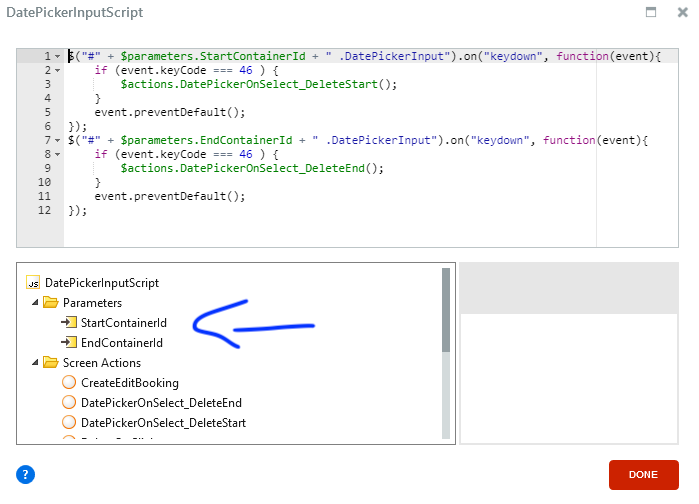
On the snippet below, I added a listener to each Date Picker and corresponding input container to call the action DatePickerOnSelect_DeleteStart or DatePickerOnSelect_DeleteEnd if the user presses the delete key (keyCode 46) and also prevent the default behaviour on the Input widgets and thus preventing the user from typing anything on those inputs.
$("#" + $parameters.StartContainerId + ".DatePickerInput").on("keydown", function(event) {
  if (event.keyCode === 46 ) {
    $actions.DatePickerOnSelect_DeleteStart();
  }
  event.preventDefault();
});

$("#" + $parameters.EndContainerId + ".DatePickerInput").on("keydown", function(event) {
  if (event.keyCode === 46 ) {
    $actions.DatePickerOnSelect_DeleteEnd();
  }
  event.preventDefault();
});
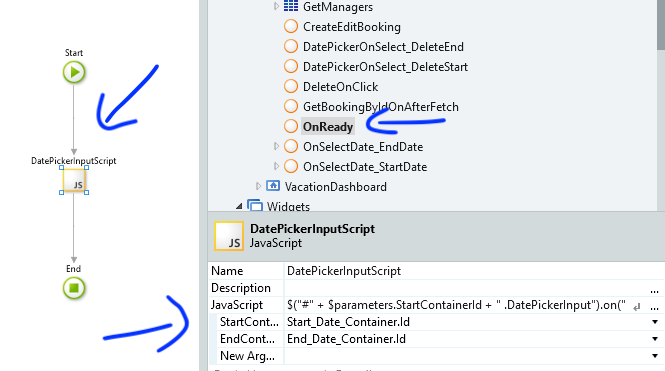
1. I selected the Screen that contains the Date Pickers, selected the OnReady option on its event property to create the OnReady action;

2. On the flow of the OnReady action, I added a JavaScript widget. I created as many input parameters as Date Pickers on the screen — in my case, I added 2 and named them StartContainerId and EndContainerId;
On the JavaScript widget, I added the snippet below (which is already posted above);
The JS input parameters should be assigned to the id of the container that surrounds each Date Picker and corresponding Input widgets — check Fig. 2.1. bottom right to see the containers being assigned to the JS input parameters. We need to add a name to the containers to be able to assign them to the input parameters.

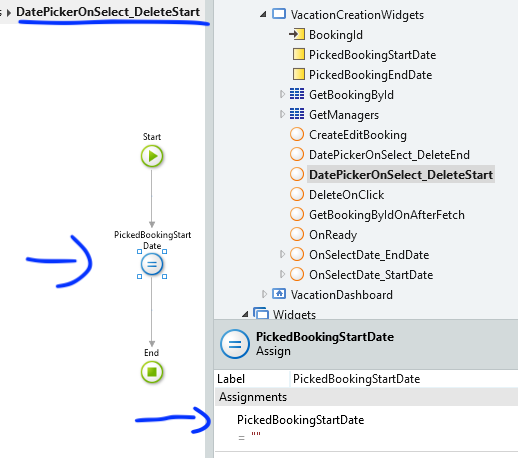
3. The delete actions are pretty simple. I just added an assign to clear the contents of each corresponding variable PickedBookingStartDate and PickedBookingEndDate.
That’s it!
If you have questions about any of the steps detailed above as well as anything from Part 1 of the guide or if you have suggestions to improve the implementation of the Date Pickers, please reach out!