OutSystems - Implementing the Date Picker widget in Mobile and Reactive apps (Part 1)
 by
by
This is a how-to guide on how to implement the OutSystems’ built-in Date Picker widget and override some undesired behaviour on the way.
I’m working on a project where, a while ago, I needed to identify all the existing Input widgets that had the data type set to “Date” to replace them with the OutSystems’ built-in Date Picker widget.
Once I started implementing the new Date Picker widget, I faced some challenges:
1. I wanted to set the date format as “DD/MM/YYYY” but the dates would show as “YYYY-MM-DD”;
2. The Date Picker is bound to an Input widget which shows the selected date. The Input widget allowed the user to write on it, whether it already had a date selected or not;
3. The Input widget mentioned above (which is inside a form) was not set to mandatory - meaning that I should be able to save a record without setting the date on it. From here, 3 scenarios emerged:
3.1. I didn’t select any date on the Date Picker and everything went well.
3.2. I selected a date on the Date Picker and then I hit delete to remove that date. Then, I saved the record and the date that I tried to delete was still persisted on the database.
3.3. Instead of directly hitting the delete key to remove the date, I selected the date with my mouse and hit delete afterwards. Then, I saved the record and this time I was able to save the record with a null date.
I created a little video demonstrating the odd behaviour outlined in point 3 above.
Content made on Kapwing
I searched the OutSystems documentation, the forums and the OutSystems UI Style Guide for solutions. This post acts as a how-to guide to set the Date Picker to behave in the best possible way.
The guide will be lengthy so I’ll split it into 2 parts. Part 1 details how I set up the widget and sorted the date format issue. Part 2 will show what I did to overcome points 2 and 3 from the list above.
I’ll be using a Reactive app to illustrate each step. The user story is I want my users to be able to book a vacation period. The following screenshots are from the screen VacationCreation, where there’s a form to accomplish my goal.
Here’s what I did:
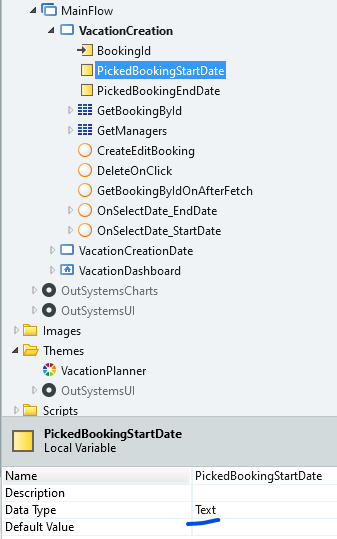
1. I created a local variable for each Date Picker on the screen. In my VacationPlanner app, I needed a Start Date input and End Date input to book my vacations. I named these local variables PickedBookingStartDate and PickedBookingEndDate. Both have the data type “Text”;
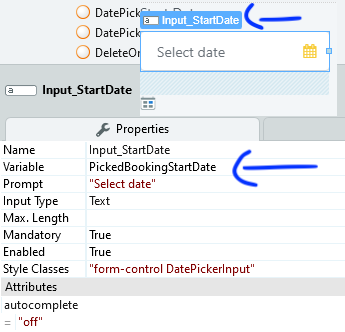
2. I set the variable property of the Inputs (to which the Date Pickers are bound) to the local variables created above. I changed their data type to “Text” as well;
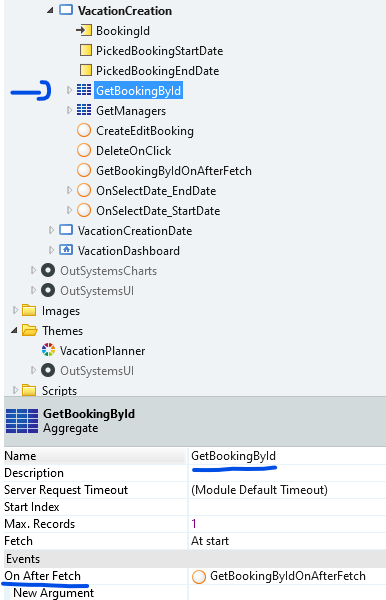
3. If the user is editing an existing vacation booking, I want to display any dates previously saved. For that, I needed to assign the variables created on step 1 to any existing date on my booking. I selected the aggregate GetBookingbyId - which is used to record and populate the fields on my screen - and added a new action to its On After Fetch event;
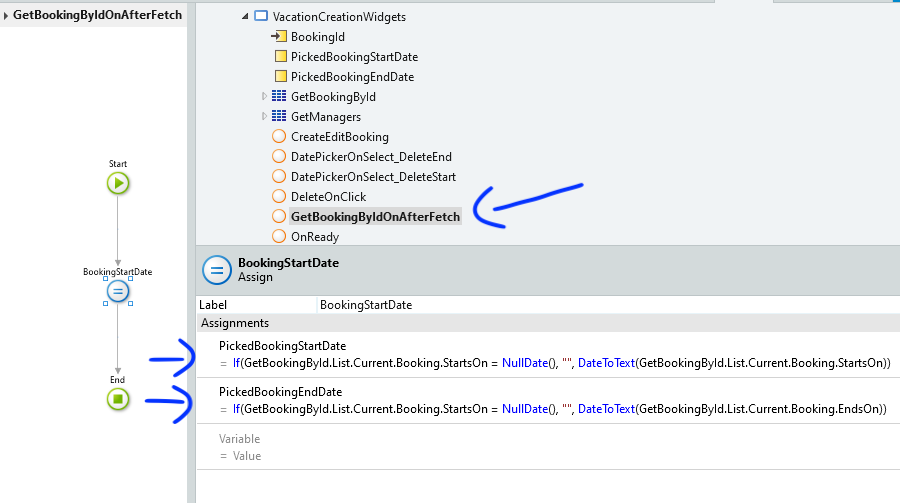
4. On my action GetBookingByIdOnAfterFetch, I assigned the dates from the database to their corresponding local variables from step 1. Here, I checked if the saved dates were null dates and, if not, I converted them into text;
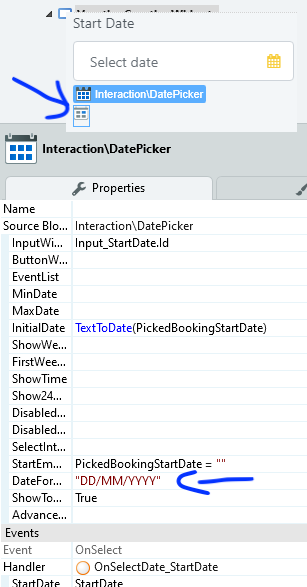
5. I added the desired date format to the Date Picker’s DateFormat property;
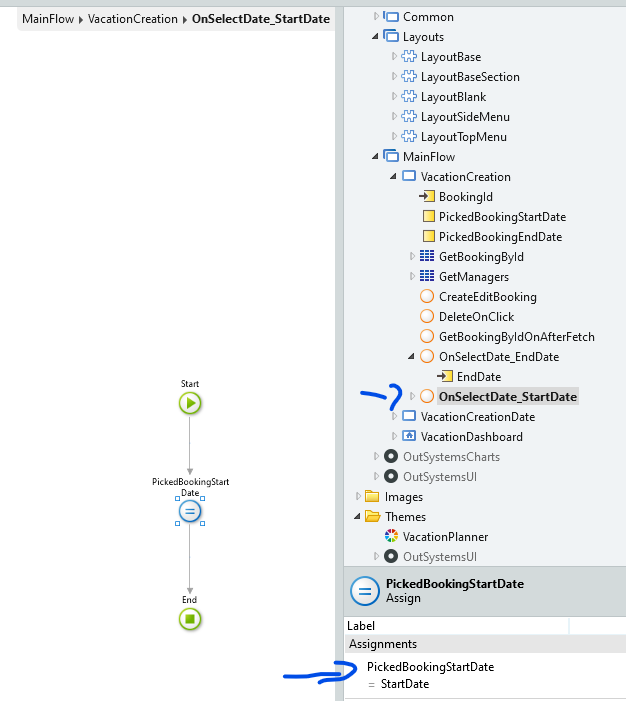
6. I set the OnSelect handler of the Date Pickers to their corresponding actions. Each picker has its own handler action - OnSelectDate_StartDate and OnSelectDate_EndDate;
7. To be able to save the new selected dates, I added the following assign on my CreateEditBooking action:
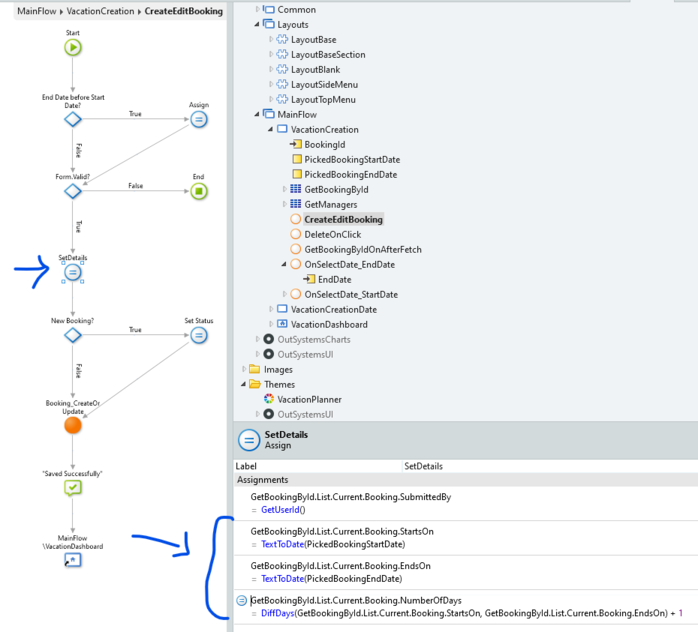
And that’s how I sorted the issue with the date format.
Check out Part 2 of this guide to see how I tackled points 2 and 3 from the list!